- Description
- Specification
- Files
- Reviews (0)
- Install
- Support
On any site, on the pages of products, categories, or the main one, there are info blocks, in which, as a rule, they place some features of delivery, payment, or in general about the online store.
Not everyone is able to open the template code and create such blocks on their own. If you are one of those people, then this module will help you a lot!
Display information blocks in a grid with the necessary icons
Capabilities
- You can display a grid of 4, 3, 2 or one block;
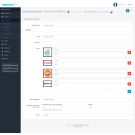
- Upload your icons in svg, png or choose from the built-in Font Awesome library;
- Styles for each block separately;
- The general block can also be styled however you like;
- Multilingual support.
- Compatibility:
Opencart 2.3, Opencart 3.0, Opencart Pro 2.3, OcStore 2.3, OcStore 3.0
- Distribution:
Free
- Ocmod:
Yes
- VQmod:
No
There are 2 types of installation: "Installing extensions", if the module file is an archive with the ending in the name ocmod.zip или "Via FTP (file manager)" when it is a simple archive with files.
Install via Ocmod
- Download module file. Paid add-ons can be downloaded in your account only after payment.
- In your site's admin panel go to "Extensions" -> "Install extensions", or "Modules" -> "Install modifiers" and click the button "Load";
- Select the downloaded file and click "Continue", wait for the inscription - "Successfully installed";
- Then go to "Add-ons Manager" or "Modifiers" and press "Update" button " (blue, top right). And also grant administrator rights for the module (see below how to do this).
Install via FTP
- Download module file. Paid add-ons can be downloaded in your account only after payment;
- Upload files through the file manager to the root of the site. As a rule, the archive contains files for different versions of PHP and OC version (you need to choose your option correctly);
- Then go to "Add-on Manager" or "Modifiers" and click "Update " (blue button, top right). And also grant administrator rights for the module (see below how to do this).
After installing any module, go to the "System" -> "User Groups" -> "Administrator" section, uncheck all the checkboxes and put them back by clicking on the "Select all" button in the view fields and changes.
Join our Telegram group!
Our community of experienced and casual users will help you solve any problems :)
Go to chat

